Thursday, September 15, 2011

Lasagna Rollups.

I made this awhile back and it quickly became one of our family’s favorite recipes.

Start by cooking your lasagna noodles al dente (rinse in cold water once they are finished cooking) and browning 1 lb of hamburger, drain.

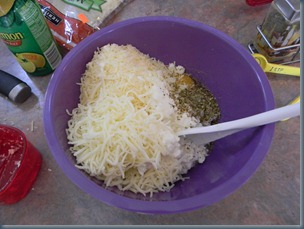
While those are cooking mix together the following in a medium sized bowl:

2 cup ricotta cheese

1/2 cup cottage cheese

1 egg

1 cup Parmesan cheese

1 cup mozzarella cheese, divided

3/4 tsp salt

1/8 tsp cracked pepper

1 tsp parsley, dried

3/4 tsp oregano, dried

1 t lemon juice

1 lb browned hamburger (if you don’t want to use meat you can sub in 5 cups of finely chopped spinach.

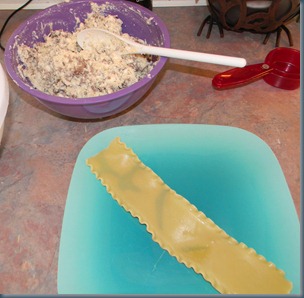
DSCN1808

Take one noodle at a time and lay it flat on a plate.

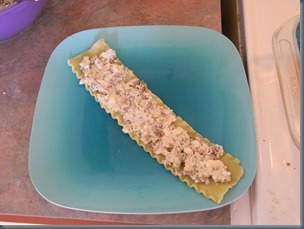
DSCN1811

Spoon a good amount of meat and cheese filling onto the noodle.

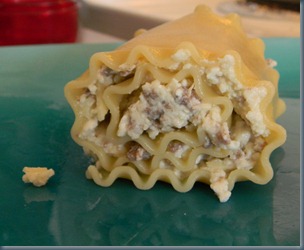
DSCN1813

Start at one end and roll the noodle into a tight bundle.

DSCN1814

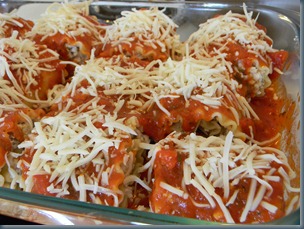
Once all your noodles are all rolled up, take a 9 x 13’’ pan and pour 1 cup of spaghetti sauce into the bottom of it. Place all your lasagna rolls in the sauce, seam side down.

Top the rolls with the rest of your spaghetti sauce and 1 cup of mozzarella. Cover with foil and back 45 minutes at 350 degrees.

DSCN1818

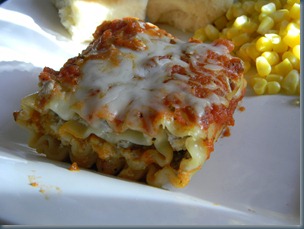
These helped eliminate the mess of cutting and serving up unrolled lasagna and the ingredients you can roll into the noodle are endless!

DSCN1820

~Jess

Wednesday, September 14, 2011

Tuesday, September 13, 2011

Homemade Chicken Nuggets with Sweet & Sour Sauce.

If you’re looking for a quick and easy go to meal that everyone in the house will eat…keep clicking. This is not the recipe for you. It is however a fantastically great recipe and easy, it just takes a little longer than other meals.
DSCN1884
Cut  3-4 chicken breasts into bite-sized chunks. Set aside.
In a bowl, mix together:
1 cup flour
1/2 cup cornstarch
1 tsp baking soda
2 tsp baking powder
1 tsp salt.
Then whisk in 1 1/2 cup cold water and stir until all lumps are gone.

Dump in your chicken and stir until all the pieces are coated well.
In a deep skillet or fry daddy whichever you have heat enough oil to fry the nuggets in to about 375 degrees.

The amount of pieces you can fry at one time is totally dependent upon the size of your skillet. If it’s large you should be able to cook 8-10 pieces without them sticking together or cooling down the oil too much. If it’s smaller then maybe 5-6.  Just make sure you get a nice golden brown all over the breading.

While you’re frying those up in a small saucepan bring the following ingredients to a boil:
1/3 cup white vinegar
1/3 cup sugar
1 TBS soy sauce or Teriyaki sauce (we like it better with Teriyaki)
3 TBS ketchup
1/2 tsp garlic powder.


Simmer for 10 minutes and then remove from heat. The sauce will thicken up as it stands and cools a bit.

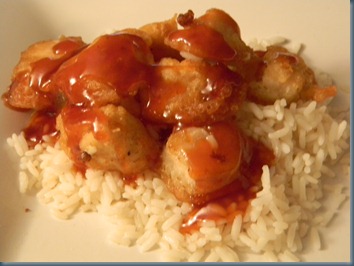
I liked mine pilled on top of rice (since I rarely eat rice) but the kids were popping these things as soon as they were coming out of the fryer.

Homemade Chicken Nuggets with Sweet & Sour Sauce….done!!!!

~Jess

Monday, September 12, 2011

String Scarf.

Would you believe in all my fabric stashes that I don’t have ANY green or yellow fabric AT ALL? I don’t wear yellow but  Isaac playing football for the Packers I had to have something green and yellow for all his football games.
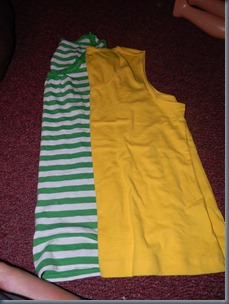
Since I didn’t have a trip to a fabric store planned I was pleasantly surprised to find 2 tank tops at a sore for $4 each.
DSCN2745
I had a scarf idea in mind, that way no matter what else I wore to Isaac’s games I’d still be wearing team colors.
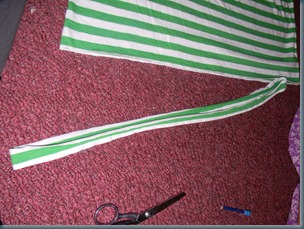
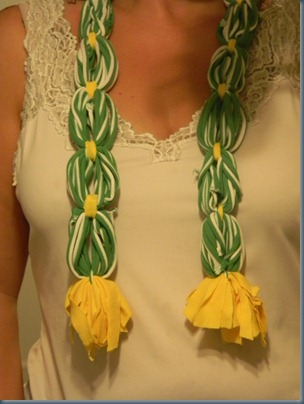
I laid out the green and white tank top out flat and cut from left to right, 1’’ strips all the way up to the top of the shirt. Here’s a picture of the first strip cut.
DSCN2746
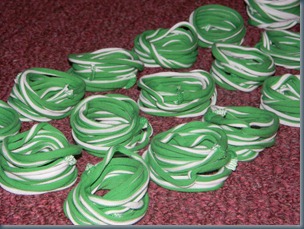
Once you’ve cut out all your strips take one at a time and stretch them out until they roll inwards.
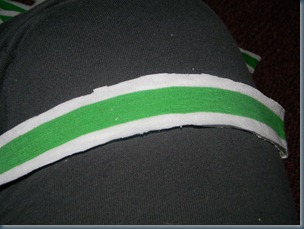
Here’s a picture of what the strip is before you stretch it: (The 2 pieces are laying on top of each other)
DSCN2749
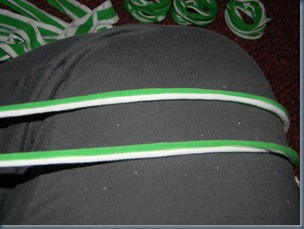
Now here’s what it looks like once you’ve stretched it just a little bit:
DSCN2750
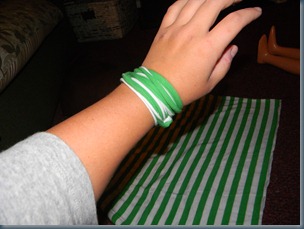
Neat huh? NOW, wrap this rolled fabric around your wrist like you would an extra long necklace that you wanted to wear as a bracelet. You can wrap it just a few times or you can wrap it until you can’t possibly go over your hand anymore.
DSCN2748
I went for completely wrapped. This will make for a fuller scarf in the end. If you wrap fewer times and make bigger loops then you’ll end up with a longer scarf but not as puffy.
Once you’ve got it wrapped around your wrist, carefully take it off your arm and lay it aside while keeping it’s circular shape.
DSCN2754
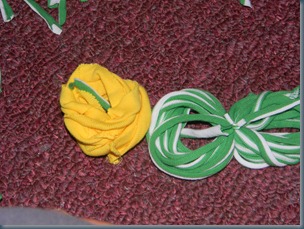
I wanted yellow on the end of my scarf so that’s why the next step shows a yellow circle as well as the green and white one. Just fyi.  Now cut thin strips from the green and white shirt or another color of fabric you have if you want that fun look. You’re going to tie 2 stacks of circles together, side by side.
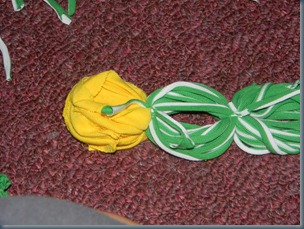
Step one, lay two circles beside each other. Thread your thin strip in and under one circle and up and through the other one beside it.
DSCN2755
Tie like you would for the first step in tying your shoe strings.
DSCN2756
Double knot it and then clip the long ends down close to the knot.
Continue on tying the side of the next circle to the other side until you’ve used all your circles or your scarf is as long as you desire.
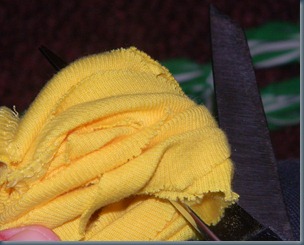
If you want little fringe things like I did on the bottom of mine then simply slide your scissors  to the end of the circle opposite where you tied your double knot and cut all the way through.
DSCN2757
Cute and fun and ready for the next Packers football game!!!!!!
DSCN2799
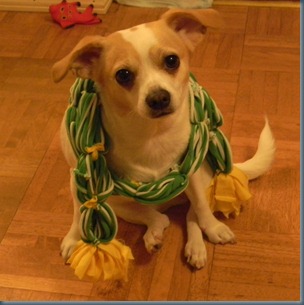
Daisy gives it her stamp of approval too!
DSCN2793
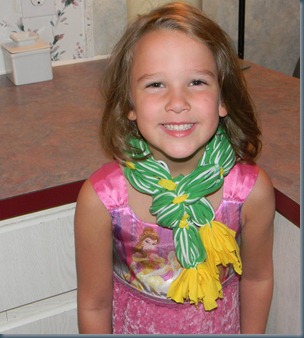
Did you really think I was going to be able to make something, take pictures of it and Evan Grace NOT get in on it? Winking smile
DSCN2804
If you notice in the pictures I went back over the parts that I tied with yellow fabric strips  to help bring in more yellow. What a fun scarf!!!!

~Jess


Thursday, September 8, 2011

No title.


I'm exhausted. SOOOOOO exhausted and the next few weeks are only going to get more and more crazy for us. I wish I could be like my sister's cat above and curl up for a nap a few times a day. Isn't Cat Face a cutie????

I have plans to sew more, of course I do. I always have plans to sew more. I've just lost my creative spunk or the drive to actually pull out fabric and start cutting and sewing. I have a list of projects I want to do, a long, long list. But Contessa just sits on her sewing desk looking at me like she doesn't know me anymore. :/

Posted by Picasa

Monday, September 5, 2011

Pie Plate Cheesecake.


1 graham cracker crust about 9'' round. You can make it yourself or just buy one like I did to say a little time.

2 - 8oz of cream cheese, softened
2 eggs
3/4 cup sugar
2 tsp vanilla.

Mix cream cheese and sugar together until smooth. Then add eggs, one at a time then the vanilla. Spread into a the pie crust.
Bake 30 minutes at 350 or until the edges are set and there's a little jiggly left in the middle.

While that's cooking mix together:
1 cup of sour cream
2 TBS sugar
1 tsp vanilla.

Once the cheesecake is out of the oven let it cool for a few minutes before spreading on the sour cream mixture.

I sliced up some strawberries, dump them in a bowl with some sugar over them, mixed well and then added them on top. Truly the best cheesecake I have ever made and I have to give all credit to Mennonite Girls Can Cook blog. If you haven't checked out their recipes you should everyone I have ever made is simply amazing!!!!

Best Cheesecake Ever.....done!


Posted by Picasa

Saturday, September 3, 2011

Ketchup!

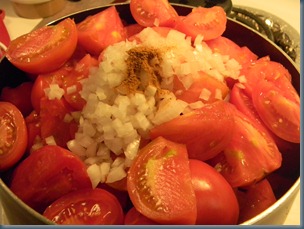
8 lbs of tomatoes ( about 24 medium size ones if you don’t want to weight them). Core and quarter them.

Dump in a large, large nonstick pot along with:

1/2 cup chopped onions

1/4 tsp cayenne pepper

DSCN2643

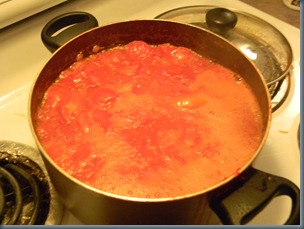
Heat to boiling and cook covered for 15 minutes, stirring often so all the tomatoes go soft.

Take a hand blender and blend up the tomato goodness until it’s as smooth as you can.

DSCN2644

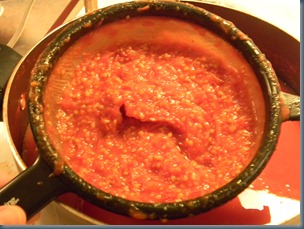
Press the tomato mixture through some kind of sieve/food mill or strainer. Discard this part:

DSCN2649

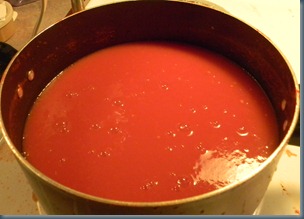
Keep all the great tomato juice and dump it back in the nonstick pot. Stir in 3/4 cup of sugar.

DSCN2647

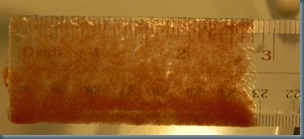
Stick a ruler into the tomato juice and pull out and check the height.

DSCN2655

Now turn on the heat until it boils. Then reduce the heat so it can simmer for 1 1/2 to 2 hours. OR until the mixture is reduced by half. This is where that ruler trick comes in handy. Smile Stir occasionally so that nothing starts to burn or stick where it’s not suppose to.

Once it’s almost ready, and in another smaller pot heat the following to a boil:

1 cup white vinegar

1 1/2 inches of stick cinnamon, broken up

1 1/2 tsp whole cloves

1 tsp celery seeds

DSCN2660

Once it boils remove from heat, strain everything through a sieve and throw out the spices. Add 1 TBS of salt the vinegar mixture then add it to the tomato juice that’s been cooking for the past 2 hours.

Simmer this for 30 minutes or until it thickens up more to your liking. Stir often.

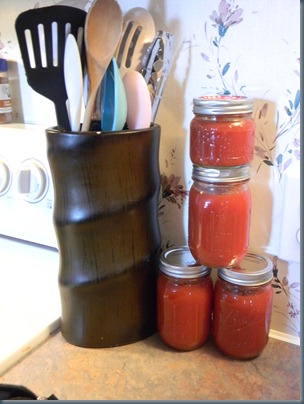
To Can: Use half-pint or pint jars. Leave a 1/2’’ head space. Screw lids on and process in boiling-water for 15 minutes. (Start timing it after the water returns to a boil). Remove from water and allow to cool on wire racks of heat proof surface.

DSCN2703

Canned Ketchup….done!!!

~Jess


Thursday, September 1, 2011

Come on Fans it’s time to scream!

Come on fans it’s time to scream, all bow down to the football team!! Sorry, I’ve heard so many cheers the past 2 months I’m kinda stuck in the rhythm of it all.

Mackenzie came home from school Wednesday of last week, excited and dropped a bomb on me.

Mackenzie: “Mom, the JV squad has to make the spirit stick for the pep rally’s this year.”

Me: “Oh neat, what are you all going to do?”

Mackenzie: “Well Ms. Malosky (their cheer coach) said she wanted one they could use for every rally instead of the ones you make out of paper towel rolls that always fall apart and have to be made over and over.”

Me: “Ok. Makes sense. What are the JV girl’s going to do then?” (Can you sense I was trying to not offer my help?)

Mackenzie: “I told Ms. Malosky you were crafty.”

By now I could see where this was going and though I was happy that Mackenzie thinks of me crafty enough to mention it to her teacher I wasn’t so happy with the thought that I might have been volunteered to make a spirit stick.

Me: “I am kinda crafty. Do the JV girls want my help or something? Want me to see if I can come up with some ideas maybe?”

Mackenzie: “I told them (meaning the JV girls) you could make one for us.”

KABOOOOMMMM!!!!!!! Just like that I was screwed.

Me: “Oh….that’s…..great!!!!! When do you need the spirit stick by?”

Mackenzie: “This Friday.”

Keep in mind this was Wednesday at about 5 o’clock. And that I had Isaac’s football practice tomorrow night. And right after that we had to go straight to the football game Mackenzie was cheering at.  And that I wouldn’t be getting home until almost 10 o’clock.

So here’s what I came up with, on the fly, on the cheap but at a cost of about 5 hours Thursday night.
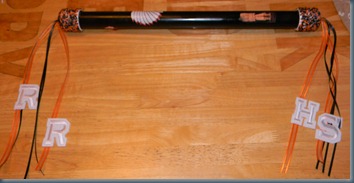
DSCN2727
PVC pipe, cut about 18’’ long. PVC end caps, with a hole drilled into the middle of them all the way through (about the width of a pencil). There’s special spray pain that’s made to stick to plastic so I used that to spray the PVC pipe black. I didn’t spray the end cap for fear the black beads wouldn’t show up as well. I left them white.
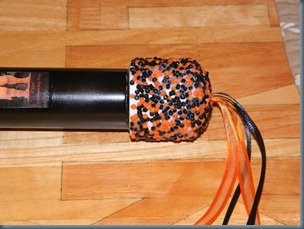
DSCN2728
I super glued all the beads to the end caps after my dad drilled the holes in the end for me. After the super glue dried I took Mod Podge and added a thick, thick layer over top of the beads and in between them as best I could to try and seal them in. After all that dried I cut black and orange ribbons and stuck them through the hole in the end cap, tied them in a knot and then used PVC cement to glue the end caps on.
After the end caps dried on I printed and cut out some mascot pictures and football pictures I found on the school website and then Mod Podge them onto the PVC pipe it’s self.  Here’s the RRHS Indian!!!!!!
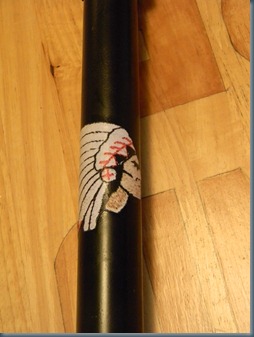
DSCN2729
Last summer someone in RR had an Indian carved out of a live standing tree. Chief Whispering Pine I think is his name. I thought it only fitting he was on the spirit stick as the school was involved in the naming process.
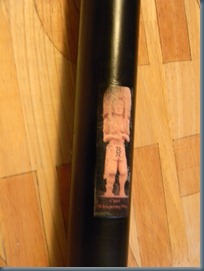
DSCN2730
Then some odd and ends pictures of football, cheer spirit stuff.
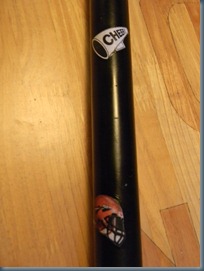
DSCN2731
Oh and then to top it all off I found some neat initial patches that I was able to stick onto the ribbons on each end of the stick. One end says RR the other HS. I think it was a nice touch to kinda bring the spirit stick all together.
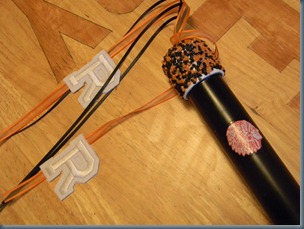
DSCN2732
It was spur of the moment and I’m glad I was able to pull it off. I’m just wondering how well it’s going to hold up with all the school spirit and crazy going on at the pep rally’s.
I never, ever want to have to make another one anytime soon!!!!

~Jess