Tuesday, August 31, 2010

Zipper Pouch to Pillow

In one of my many blog searching and reading I came across a pattern for Boxy Zippered Pouch.
(This is not my photo or the one I made)

 It looked easy enough so I made one for my littlest one. Then I had a thought, why not make a bigger version so that when I was on travel I would have something cute and strong enough to hold my hair things and such.

I cut two pieces of fabric 22 x 14. On one long end of each piece I folded under the edge and pressed them flat.
Then I pined in a zipper under the folded edge and sewed it in to place.
Once the zipper was in, I matched up the bottom long edge of the piece, right sides of fabric together and sewed a seam down the entire length. Now the top part of your pouch is sewed into a zipper and the bottom part of the pouch is sewed shut.
Move back up to the zipper and open it a few inches. DON'T forget this step, if you do and move on to the next step you will not be able to turn your pouch right side out. :)
This step is a little tricky to explain. Center the bottom seam over the zipper (still with right sides facing). You can press this flat with an iron or if your fabric isn't too slippy you can pin in place. Now sew a seam down both short sides of your flattened pouch. Make sure you go over the zipper a few times to give it strength and secure it in place.


Pinch the zipper and bottom seam between your fingers and pull out. This will give you 4 corners. Lay one of the corners on your measuring/cutting mat and measure up 3 inches from the point into the bag. Mark with a pencil or pin in place. Do this for all 4 corners. You will sew on this line and cut off the excess. This creates the 'box' part of this pouch.
 I know you probably got distracted by how gorgeous my Morganite ring is, I do too at times, but please, eyes back on your sewing project ok? ;)

Now you can turn your boxy zippered pouch right side out through the zipper you left open and be left with something like this.
Yeah, not exactly what I thought was going to happen. If I had thought this through I would have realized that the material is too light and the size of it too big to hold it's self up. The reason the small boxy zippered pouch works so well is because it's small. I should have added in interfacing for strength. Instead of this being my accessory bag for travel I decided to stuff it with pillow stuffing.

And ended up with this:

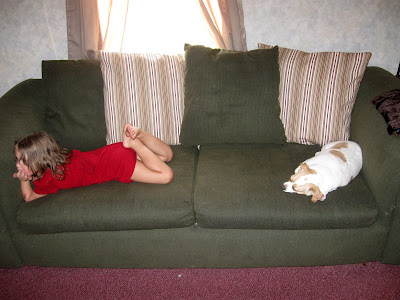
It's not exactly a pretty shaped pillow (the interfacing would have helped that as well) but everyone in the house has ended up loving this pillow, especially the dog. It's a great couch pillow and a wonderful neck pillow. 
I  made two more of these pillows for my mom, (this time with interfacing and a different zipper placement) and they turned out much better. It's going to be hard to give them to her, they both look so great on my bed.


Posted by Picasa

I'm linking up:

Friday, August 27, 2010

Straight to the Recipe Box.

I love it when I come across a recipe that's easy but tastes like it's a lot of work. This is one of those recipes and as soon as I took a bite the recipe card went straight into my recipe box, which rarely happens.

Three Cheese Baked Spaghetti

Here's a list of the ingredients you need for the pasta part of this dish.
8 ounces spaghetti, cooked and drained.

While your pasta is cooking mix together the following in a separate bowl:
2 tablespoons butter
1/2 teaspoon salt
1 1/2 teaspoons dried parsley
1 cup cottage cheese
1/4 cup grated Parmesan cheese
 (1 1/2 cups) shredded mozzarella cheese*

Mash this mixture into the still hot spaghetti noodle, then spread this mixture into the bottom of a well greased dish. I used a 7x 11 but you can use an 8'' pan too.

Now the ingredients for the sauce part of this delicious spaghetti:

1lb ground beef, browned and drained.
1 tsp garlic powdered
1/2 onion, chopped
1/4 teaspoon ground black pepper
3 cups spaghetti sauce
1/2 tablespoon sugar
1 teaspoon Italian seasoning
1/2 cup shredded mozzarella cheese, or cheddar

Once your beef is browned and drained, add all other ingredients except for the mozzarella/cheddar cheese. Cook until warmed through then spread on the top of the cheese-noodle mixture. Now add the mozzarella/cheddar cheese on top.
Bake uncovered, 350 degrees for 35 minutes, or until cheese is melted and it's all bubbly.

Everyone in the house ate this for dinner. I couldn't believe my two youngest actually enjoyed it and asked for seconds. They love pasta, but spaghetti has never been a favorite of theirs. This one is a keeper and I may add it to the bi-weekly menu plan.

Posted by Picasa

Wednesday, August 25, 2010

Couch makeover with pillow

When the kids and I moved into our new place back in April my sister and her hubby was nice enough to give us their extra couch. It's in great shape but the flowers don't scream ME!

So I found some great material that was more me (and that matched the red carpet that came with the place) and made a simple pillowcase with a zipper for each of the flowered cushions. Looks great but in my mind it wasn't quite finished.
So I cut about 6, 2 inch wide and 28'' long pieces and sewed them into one long strip. After that I turned down the top edge of the strip and sewed it down so that the fabric wouldn't unravel. I had some matching light brown fabric that I cut a square 14x14...though I didn't take a picture of it.
Then I started pinning the long long long strip in a pleated circle on the front piece of my brown square. Then I sewed it down. You could do this with a ruffle but I was going for more of a controlled look to the ruffles/pleats. I think it goes better with the strips in the fabric.

Once the outer circle was sewed in place I added another circle of pleats. Make sure you pin the pleats in place so that the outer edge of the second row covers the inside bottom edge of the outer circle so that all stitching and rough edges are covered up.
Then add a 3rd circle, pin and sew in place.

Then a 4th circle, pin and sew in place.

Then a 5th circle, pin and sew in place.  

You should be left with a small circle in the middle of the fabric that couldn't possible hold another circle. Make a small pleated circle in your hand or on another work service and stitch the bottom edge of the circle to the other edges of the same circle. You'll have something like this.
Pin in in place over the empty circle left by your pleated circles and sew in to place. Next find a pretty button to go in the very middle and machine or hand stitch into place. I know, I'm kinda sick of looking at all the stripes too, but we're almost done.
The front of your pillow is finished, but wait!!!! before you sew the main pillow parts together, make sure you pin back the pleated/ruffle parts that might get caught in the side seams of the pillow. Don't forget this step or you'll be ripping out stitches and holding back naughty words.


Now lay the back piece of your pillow square (the light brown color) right side of the fabric, right on top of the pretty pleated circles you just spent an hour or so doing.  Pin everything in place but make sure to leave a 4-5'' opening for turning everything right side out and sew together. (If you make a bigger version of this pillow you may want to leave more than 5'', it gets awkward turning all of it right side out.

Once everything is turned right side out, start shoving in the pillow stuffing. Use as much as it can hold without messing with the square shape. Don't forget to push some stuffing into the corners of the pillows so they stand up into points. When you've added enough stuffing,  hand stitch the opening closed.
I really liked making this little pillow. I've always had a hard time sewing curves and circles and this was a safe way to practice without the end result looking sloppy or really ugly. If I make this pillow again, and I think I will, I'm going to cut the pillow pieces into a bigger square but keep the circle the same size. I think that way the pleats on the outer part of the pillow will hold their circle shape better instead of kinda fold in on themselves like they do in the pictures. :) 


                                                                                                                                    Sister Sister Sunday

Photobucket     

Tuesday, August 24, 2010

Greatest Find EVER.

Do you know what this is? I discovered this little jewel about a year ago and immediately wanted one. It's a French Butter Crock. I was tickled pink to find this white porcelain for $12 online. What's the purpose of this Crock? Please let me explain.


This is what you get when you take the lid off. See how it has another square on the underside of the lid? That's where you cram an entire STICK OF BUTTER.

I've seen different measurements for how much water you're suppose to put in the base of your French Butter Crock but this one instructed 1/2 cup of water. The water keeps the butter spreadable without allowing it to separate into the mushy oily goo that happens when butter is left out for too long, while keeping it fresh and odorless. Simply change the 1/2 cup of water every 7 days and keep adding butter as needed.

Greatest find ever right?

Posted by Picasa

Saturday, August 21, 2010

First Day.


This past Wednesday was Mackenzie's first ever day of public school. She was so excited and so nervous. I was so excited and so nervous as well. This coming week will be her first full week, complete with a new block schedule and homework. Everyday she comes home full of stories about her classes, new friends, and the teachers. She's only opened her locker twice in the entire 3 days she was there....thank heavens for nice locker neighbors that have helped her with the combination. I'm proud of her and I know she's doing well in public school. I'm anxious to see how the rest of the month goes and I'm curious when the dreading will set in too. :)


Posted by Picasa