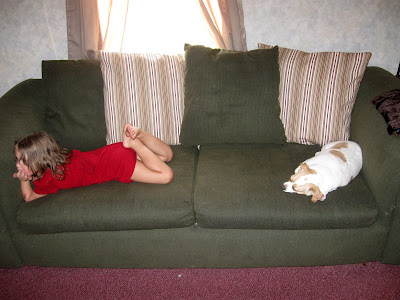
When the kids and I moved into our new place back in April my sister and her hubby was nice enough to give us their extra couch. It's in great shape but the flowers don't scream ME!

So I found some great material that was more me (and that matched the red carpet that came with the place) and made a simple pillowcase with a zipper for each of the flowered cushions. Looks great but in my mind it wasn't quite finished.
So I cut about 6, 2 inch wide and 28'' long pieces and sewed them into one long strip. After that I turned down the top edge of the strip and sewed it down so that the fabric wouldn't unravel. I had some matching light brown fabric that I cut a square 14x14...though I didn't take a picture of it.
Then I started pinning the long long long strip in a pleated circle on the front piece of my brown square. Then I sewed it down. You could do this with a ruffle but I was going for more of a controlled look to the ruffles/pleats. I think it goes better with the strips in the fabric.

Once the outer circle was sewed in place I added another circle of pleats. Make sure you pin the pleats in place so that the outer edge of the second row covers the inside bottom edge of the outer circle so that all stitching and rough edges are covered up.
Then add a 3rd circle, pin and sew in place.
Then a 4th circle, pin and sew in place.
Then a 5th circle, pin and sew in place.
Pin in in place over the empty circle left by your pleated circles and sew in to place. Next find a pretty button to go in the very middle and machine or hand stitch into place. I know, I'm kinda sick of looking at all the stripes too, but we're almost done.
The front of your pillow is finished, but wait!!!! before you sew the main pillow parts together, make sure you pin back the pleated/ruffle parts that might get caught in the side seams of the pillow. Don't forget this step or you'll be ripping out stitches and holding back naughty words.
Now lay the back piece of your pillow square (the light brown color) right side of the fabric, right on top of the pretty pleated circles you just spent an hour or so doing. Pin everything in place but make sure to leave a 4-5'' opening for turning everything right side out and sew together. (If you make a bigger version of this pillow you may want to leave more than 5'', it gets awkward turning all of it right side out.
I really liked making this little pillow. I've always had a hard time sewing curves and circles and this was a safe way to practice without the end result looking sloppy or really ugly. If I make this pillow again, and I think I will, I'm going to cut the pillow pieces into a bigger square but keep the circle the same size. I think that way the pleats on the outer part of the pillow will hold their circle shape better instead of kinda fold in on themselves like they do in the pictures. :)
Sister Sister Sunday


10 comments:
Great pillow. I love the look. I've been avoiding sewing for years, but every time I see cute projects like yours, I think about sewing again. I get over it pretty quickly, but your pillow makes me want to give it a shot.
Come visit my site and enter to win my first give away. http://froufrugal.blogspot.com
Cute pillow! I'd love to have a similar one for my home!
So cute! Thanks for sharing!
What a gorgeous pillow, it came out great! Love the texture of the stripes and pleats, very graphic. Your instructions are really good. Cutie pie model, too.
Great blog. I'm your newest follower.
Thanks for all the wonderful comments and new followers :) does my heart good to see and read each and every comment and check out your blogs as well.
Suesan...I entered your neat giveaway thanks for the invite.
~Jess
Thanks for participating in our Sassy Sites blog hop! So many great blogs on there!! Don't forget to come back for our Sunday Spotlight and to sign up for the giveaway, if you haven't already! It's gonna be a good one! :) xoxo
Marni @ Sassy Sites!
Great look ! Thanks for sharing
Caroline
http://ateliercaroline.blogspot.com/
this is really cute. I think I'll have to try this out soon, we are in the process of updating our look.
This is so fun & you did a great job!
Found your link on Kusak's Closet's link party.
Rachelle S.
www.chelstamps.blogspot.com
Post a Comment